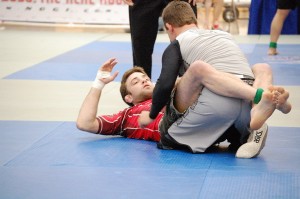
Ryan Hall ADCC 2009: closed guard

Ryan Hall is well known for his aggressive guard.

Closed guard is a powerful position for the guard player as it restricts the top person’s movement by immobilising their hips. A person skilled at closed guard will be seeking to off balance his opponent by breaking posture and cutting angles to threaten sweeps and submissions. A person unskilled at closed guard will be doing nothing but keeping his ankles tightly locked together.

Here is an unfortunately familiar series of events. A beginner starts BJJ. He gets submitted many times when rolling. He eventually gets closed guard and holds it as hard as he can. He doesn’t get passed and submitted. From then on, he pulls closed guard as much as possible. He doesn’t get passed so he thinks he is improving. Time passes. He gets passed when he attempts armbars or triangles, so he only attempts submissions that don’t require him to uncross his ankles. He eventually experiments with other types of guards and quickly gets passed so he returns to the safety of closed guard. The longer this continues, the further behind his guard skills will be. It will be much more (emotionally) difficult for him to develop the rest of his guard game when the time comes.

It is very easy for a beginner to fall into this trap. I was in that trap myself for the first couple of years training BJJ and I’ve seen several of my training partners fall into it as well.

I no longer teach closed guard to beginners. I consider closed guard a more advanced guard that requires good hip movement skills before it can be effective. This has had some interesting outcomes. The students that I delayed showing closed guard to are much more active with their BJJ. They fight harder to achieve the top position, and their submission attempts from guard are more aggressive.

Martin Aedma published a very good post about guard attitude a few months ago. It’s worth reading.

When I first started BJJ, I believed that BJJ was all about the tiny details. For two years, I made detailed notes about every class I attended. Pridefully, I thought the notes were pretty good. They read like a recipe for each technique “R hand cross grips opponent’s lapel with fingers in, knuckles resting on collarbone. L hand grips outside of opponent’s R sleeve with thumb up. L foot on opponent’s R hip …”

These notes are, of course, worthless. Their only use is to show that I didn’t understand BJJ at all.

With a recipe approach, a student becomes stuck when the move fails. A student typically assumes that the details aren’t being applied precisely enough: “My hand must not be in the right position, or perhaps I’m doing the steps in the wrong order”. The end result is confusion, or concluding that the move doesn’t work.

A recipe doesn’t give any information as to which are the essential steps, and which can be modified or left out. But the biggest problem with the recipe approach is that the student has no idea why the steps are being performed.

A better approach is to focus on the concepts first. Details can be added later, or more likely, left to improvisation. With the one or two important concepts of the move, the student knows what they are trying to achieve. The movements they make have the definite purpose of achieving those concepts.

An example: escaping the mount position. The most important concept is to keep your elbows glued to your ribs. In this position your arms are strong and can’t be harvested. Your elbows block your opponent’s thighs keeping his hips over your hips and, more importantly, his feet accessible to your feet.

The second concept is winning the foot battle. The top person will be trying to keep his toes together and feet under your butt / thighs. You must clear his feet so your feet or legs can touch the floor with the top person’s feet to the outside of them.

From here, you can apply high percentage escapes — bridge and roll, elbow-knee escape, hydraulic etc. The key details of these escapes can be shown in a couple of minutes.

The concepts, in this case elbows to ribs and winning the foot battle, are the most important things a student needs to remember. The details are the means by which the concepts are achieved. I find teaching concepts first is a faster way to learn BJJ.

BJJ is a combat sport and injuries happen. One of my friends injured her knee in the 2009 Pan Pacific BJJ comp. It took a long time to heal and she had just started training again when she re-injured it during wrestling class. This got me thinking about all the injuries I’ve witnessed during my years of training. The most common injuries are knee injuries and they almost always occur when training takedowns.

When a student is unskilled, a common takedown attempt is to grab their opponent’s upper body and try to trip her with their legs. Injuries can occur if the opponent’s foot sticks to the mat while her body is twisted. This twisting pressure can injure the tendons around the knee.

To stay safe, the wrestler must keep a lower stance which will help keep the feet mobile. Of course merely telling the wrestler this doesn’t help. They must practise in a way that develops a need to do so. With this in mind I changed the way that takedowns are trained. Since I’ve made this change, everyone’s standup grappling skills have improved, they are more confident on their feet and no injuries have occurred.

For two weeks, no takedowns were allowed. Students formed small groups with two students wrestling and the other few watching. The goal of the two wrestlers was to simply pick their opponent up so both feet are off the mat. The winner stays in and the next student comes in, round robin style.

The student is forced to have a good stance to be successful at this drill. Their hips must be low and away from their opponent while they fight for an advantageous grip. Once they’ve established a good grip, they must bring their hips under them to have the power for the lift. They are also learning how to sprawl with heavy hips to prevent being picked up themselves.

The natural progression of this drill is for the students to have their head too low and hips too far back, to prevent themselves from being lifted. When this happens, snapdowns are introduced. The rules are changed so that if a wrestler’s hand touches the mat he instantly loses. This rule change corrects the stance.

As there are no takedowns, there is no fear of being injured or slammed. Students stop being timid and more aggressively work their shots. When everyone is looking confident, the rules are changed so that merely picking the opponent up isn’t enough to win. They must also put (not slam) the opponent down onto the mat. This part of the drill is physically difficult as it requires lots of energy.

Next single leg takedowns are allowed. Then double leg takedowns, and finally any takedowns. We are now back to practising full takedowns, but everyone has much better stances. Their sprawls are better and also their pummelling has improved.

I really like the way that this sequence of drills worked to improve everyone’s standup grappling. It works well because the students teach themselves. Instead of saying “Bend your knees, hips back, head up”, I just say “Try to lift me up off the mat but don’t let me lift you up”. The drill does the rest.

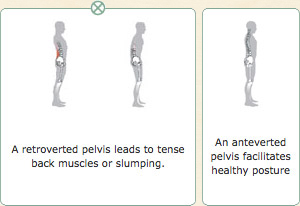
During wrestling class today we were working basic lifts. My partner, 10 kgs heavier than me, was straining his lower back to lift me. We’re constantly told to lift with our legs not our backs, but what does this mean? One of the key detail we need to look at is pelvis rotation. An incorrectly rotated pelvis puts extra strain on the spine and causes a loss in strength.
Anteverted pelvis

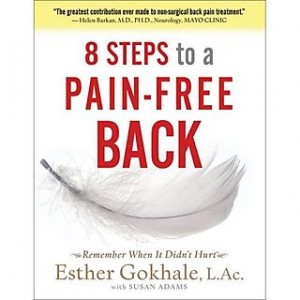
I use to think my posture was okay, but then I read Esther Gokhale’s excellent book and realised that my posture was not good at all. Despite the name, this book is really about correct posture. Read this book. There is lots of information that can be transferred to grappling.

8 steps to a pain-free back

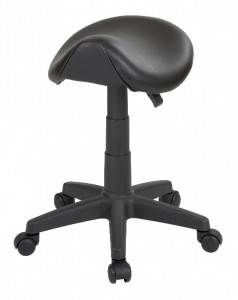
Most chairs are terrible for your posture. If you spend lots of time sitting then you want a chair that doesn’t hinder your posture. I use a saddle stool and the twinges I used to get in my lower back have disappeared. They can be a little hard to find, but they’re worth it.

Saddle Stool

This type of chair is great for improving your posture

“How do I finish the armbar?” This is a common question that beginning students ask. The typical response to this question is “Squeeze your knees together, point your opponent’s thumb away from your chest then raise your hips”. This is fine instruction for a raw beginner. Once the beginner starts to gain more experience, they receive more details “Pull your heels towards your butt, touch your toes together, hug your opponent’s arm to your chest”. Students can easily be left with the idea that to get better at a technique, you must learn more details for that technique.

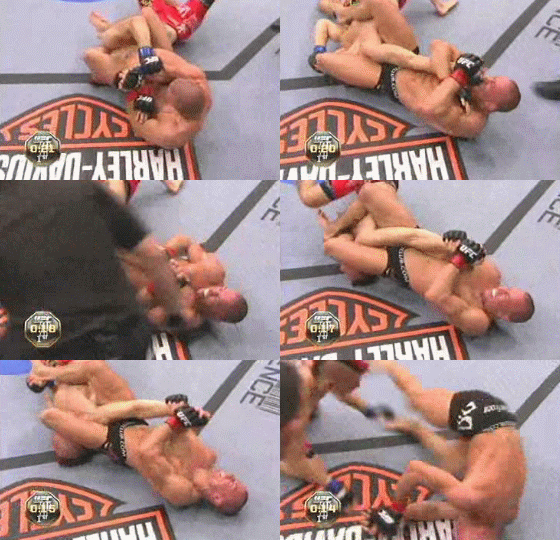
The problem with this detail oriented approach is that the student doesn’t understand why the armbar works. This means they can’t troubleshoot when it fails. Consider the fight between Georges St. Pierre and Dan Hardy during UFC 111. During the first round, GSP has a tight armbar on Hardy, but Hardy escapes. Why did the armbar fail? What mistake did GSP make that allowed Hardy to escape?

Georges St. Pierre attempting armbar on Dan Hardy - UFC 111

Georges St. Pierre attempts an armbar on Dan Hardy at UFC 111

A detail oriented student will claim the armbar failed because GSP didn’t squeeze his knees together, as this is the obvious detail that is absent. If you do an Internet search you will find many people claiming this to be the reason. This is incorrect. If GSP did squeeze his knees together, Hardy would have escaped even earlier.

To understand why the armbar failed, we must first understand the principles behind the armbar.

The arm is essentially two rods connected with a hinged joint. The goal of the armbar is to hyper-extend this joint beyond its maximum extension, using the strong muscles of the legs and hips. The armbar is achieved by clamping the ends of these rods (shoulder and wrist) in place while the hips push into the joint to hyper-extend it. The obstacle to performing the armbar is that the shoulder can rotate so that the elbow is no longer in line with the force applied by the hips. This rotation removes the hips ability to hyper-extend the elbow.

The principles behind the armbar are:

  1. Immobilise both the wrist and the shoulder
  2. Ensure the elbow is in line with the hips
  3. Raise the hips to hyper-extend the elbow

All the details we know about performing the armbar are to assist with these principles.

If we re-examine the GSP vs Hardy match, we see that initially GSP has immobilised Hardy’s wrist and shoulder. Hardy manages to rotate his elbow to prevent the hyper-extension. GSP changes his grip on the wrist from a tight elbow hook to a double wrist grab. This is the mistake that causes the armbar to fail. GSP would like to rotate Hardy’s hand so the elbow also rotates to become in line with his hips, but he cannot got a good grip due to the gloves. The double wrist grab is not strong enough to immobilise Hardy’s wrist, so it is only a matter of time before Hardy escapes.

Squeezing of the knees would not have solved GSP’s problem. Squeezed knees might have made it slightly more difficult for Hardy to rotate his elbow, but it was the loss of wrist immobilisation that allowed Hardy to escape.

Beginners respond well to a detail oriented approach to learning BJJ. But to move beyond mere competence, student’s require the principles involved so they can understand the purpose behind the details.

Small details can make all the difference in BJJ. For example, grabbing at the hand instead of the wrist can be the key detail that allows a successful armbar. Because of the huge effect of seemingly small details we can become obsessed, beginning a quest in search of perpetual refinement. The problem with this is that there are two categories of details, details that are universal and those that are specific to the individual.

An example of a universal detail — rear naked choke: aligning the crook of your elbow with your opponent’s chin is a more effective choke because pressing is applied to both of the carotid arteries. Universal details are performed by everyone in the same way.

A more individual detail, and one that is commonly sought by beginners, is as to the exact place to focus your weight when in side control top position. Everyone you ask will give a different answer depending on their body type, their opponent’s body type and their position the opponent is in.

Universal details can be precisely described by your coach. Individual details must be confirmed through rolling or isolation training.

As coaches, it is our responsibility to clearly distinguish between these categories of details. An approach I take is to identify universal details to the class as the “ideal”. Individual details are identified as “options that may or may not work for you”. I only go into more depth with individual specific details when I am working with individuals or pairs.

Very early in my BJJ career, I attended a seminar where the black belt detailed the correct posture to have when kneeling in an opponent’s closed guard. He emphasised the detail that your butt should never touch your heels, but should hover over them by about an inch. The black belt never explained why we should hover this way. Whenever I tried this my thigh muscles fatigued quickly, and so I abandoned that detail.

But it’s always stuck in my mind. I’ve watched many high level competition matches and have never seen anyone else performing this detail. So why was this detail emphasised? Why is it important? My best guess was that having the thighs under tension allows your legs to react faster than when relaxed. The mystery was finally solved when I read Cane Prevost’s closed guard top posture post.

Cane details “Hips rotate in and up. You should feel your pelvis lift slightly off the floor”. Aha! This position puts the glutes under tension, but without much fatigue. The tension allows the legs to react fast to regain balance if needed. I believe that the original hover detail was individual specific, while Cane’s detail is a universal way of achieving the same result.

This example really emphasises for me the confusion that a student feels when there is no distinction between universal and individually specific details. As good coaches, we should strive to make this distinction to our students.

There are obvious physical differences between men and women. Self defence courses often take a one-size-fits-all approach to self defence, creating courses that may work for men but will rarely work for women. This leads to horrible advice such as biting, eye gouging and kneeing the groin. This advice is horrible — not because of the violence — but because of the likely outcome when it doesn’t work. When an inexperienced defender attempts these moves, rather than disabling the attacker, she is much more likely to enrage him.

Here is an essay on self defence for women that examines how women can successfully defend themselves against a stronger adversary.

The 80/20 principle is the observation that for many events, 80% of the results come from only 20% of the effort.

This principle is used successfully in many industries, from business to engineering, to get the most result for the least effort. Without the luxury of limitless resources, we must use the resources we do have wisely to get the most “bang for the buck”.

We can use this principle as a guide for how to learn, and get better at BJJ. By learning the “best” stuff first we maximise our progress.

For example, if there are 10 moves to learn and 10 hours available, how should we best structure our training? The naive, but common, approach is to simply allocate one hour to each move. This way the practitioner gains equal experience with each move, regardless of that move’s overall effectiveness.

We need to acknowledge that all moves are not equally effective. Rather than one hour per move, allocate say 6 hours to the 2 best moves, and share the remaining 4 hours between the 8 less effective moves. Then apply the 80/20 principle again on these 8 moves, so the more effective moves gets apportioned more time than the less effective ones. The actual numbers in this example aren’t set in stone, but you get the idea. More time is spent on the effective moves, while less time is spent on the not-so-effective moves.

BJJ provides an easy way to distinguish between more effective and less effective (also called high percentage and low percentage) moves — rolling. Averaging over many rolls, high percentage moves are those that are successfully completed more often than low percentage ones. It is these high percentage moves that you should learn first and spend the most time on. If you have extra time and the inclination, you can then invest in the low percentage moves.

The 80/20 principle gives us a guide for beginning to learn BJJ. First focus on the high percentage moves. Only once you have proficiency with these should you move on to the low percentage moves.

See Misapplying the Pareto Principle for more details.