Posts

“Here are three random techniques. Let’s drill them with no resistance and then roll.” If you’ve had the misfortune to train this way you’ll understand how terrible it is. The naturally gifted will improve while everyone else flounders. It leads to frustration and ego problems. Let’s move beyond this.

The goal in BJJ is to be able to roll against a fully resisting opponent. The logical approach is to start with an unresisting opponent and progressively increase the level of resistance until you have a fully resisting opponent. But it’s not as simple as just starting with light resistance then progressing to heavy resistance. In every training session, people of different weight and skill will be partnered together. How is it possible for a 50kg person to provide sufficient resistance so a 100kg person can improve their skills? Or a white belt to a purple belt?

The key is to understand what is progressing in progressive resistance. It’s not so much a physical resistance as it is a technical resistance.

When strength training, you start with a lighter weight and progressively increase to a heavier weight. With BJJ you are not training strength but skill, so the resistance should reflect that. As a coach, merely instructing your students to “use 20% resistance” is inadequate. Partners of unequal weight or skill become confused “You’re a purple belt and I’m a white belt so I should use more than 20%, right?”. Partners of the same weight and skill argue “That’s 30%, not 20%. Stop cheating”.

To lessen the effect of a strength imbalance, both training partners should use as little strength and explosiveness as necessary. But more importantly, the coach should dictate the specific, unambiguous technical resistance to use.

Rolles Gracie defeats Lee Mein via arm triangle.

We’ll use a concrete example: practising the arm-triangle choke from mount. This submission has a simple sequence.

  1. Raise one of your opponent’s arms.
  2. Position yourself so that your bicep is against one side of his neck and his own shoulder is against the other.
  3. Remove any slack by lowering your chest and circling your body before squeezing your arms to finish the choke.

Assuming that the students have basic familiarity with the choke, here is one1 sequence using progressive resistance to improve their skill in applying it. All the following instructions are for the opponent (bottom player).

After a few repetitions with no resistance, the first resistance is to try to prevent your arm from being raised. That is the only objective. Don’t fight the rest of the choke and don’t try to escape the mount. The method is to use as little muscular strength and movement as possible. You might hold your hands together, bridge your hips, push your opponent or anything else. Don’t just do the one form of resistance, change if you feel your arm is about to be raised. Be creative and find what is most effective at stopping the top player from raising your arm.

Once the arm is raised, all resistance stops and the top player finishes the choke. The resistance is isolated to this one area of raising the arm. A coach would expect to see the top player using a range of techniques to try to raise the arm; threatening ezekiel chokes, pushing with elbows for greater leverage, switching to side control and back to change the angle etc.

After the top player starts having regular success, we up the ante. The bottom player is now instructed to attempt to escape the mount as a means of preventing their arm from being raised. If the students are new to this type of training, it is extremely important that the coach emphasis that this a drill and not a roll. The reason we are doing it is so the top player can practise the choke. It is not an opportunity for the bottom player to practise their mount escape. Students from gyms that don’t practise progressive resistance often have trouble at this stage.

When your arm becomes raised, try to prevent the top player pinning your shoulder against your neck. You can buck, turn on your side, grab your inner thigh or any improvisation that keeps your shoulder away from your neck. You’re still resisting your arm being raised and you’re still using the smallest amount of muscular strength and movement as possible. When your shoulder gets pinned to your neck then the resistance stops and the top player finishes the choke.

Here the top player learns all the important details of having a tight hold in this position. Their elbow will be on the ground. Their head will be pressed tightly against their opponent’s head. Their hands will be gripped correctly. If the coach sees that the top player is missing technical details, he should suggest resistance that the bottom player should provide that gives the top player an opportunity to develop the correct technical response.

e.g. If the elbow of the choking arm is not on the ground, the coach might suggest that the bottom player “turn into your opponent and push his head with your free hand”. This brings the space to the attention of the top player. Resisting the head push by driving into it will bring the elbow back down to the ground.

e.g. If the top player’s hands are gripped incorrectly, the coach might suggest the bottom player “bring your feet to your butt and wiggle backwards”. This movement of the bottom player applies external rotatation the top player’s choking arm, signaling him to regrip.

Now you’ll be resisting all of the choke. If your opponent positions your shoulder against your neck, don’t let him tighten the choke. Follow him as he circles and try to create space between your shoulder and your neck. If your opponent is off balance, feel free to reverse him.

Here we are drilling the final step of technical resistance. The top player will learn to maintain tight head pressure, have a low base to prevent being reversed, and use his knee to maintain space as he circles.

Finally the coach will add strength and explosiveness to the resistance. If there is a consistent weakness in a particular area, then a new drill is created to emphasize the weak area. Perhaps strength and explosiveness are only allowed in the weak area, or perhaps they are disallowed in the weak area but allowed everywhere else.

The take home message from this example is that the progression of the resistance should be technical (movement based), rather than attribute (strength, flexibility, power) based. This provides the student with an environment where they feel comfortable to experiment and fail, which is necessary for them to learn to succeed. Only once a technical ability is developed should attributes be emphasized.

1 It is often more effective to teach submissions by applying the resistance backwards. This way the learning becomes easier as you progress because you are moving into a familiar behaviour, rather than away from one. Search for backchaining behaviour training to see how it is used in other training areas.

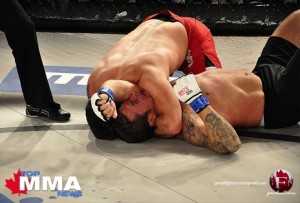
The goal of BJJ is to make your opponent give up, to submit. Each of us will be forced to submit many times while training. It’s a humbling experience. Those of us without any ego problems tap, learn and keep training. Those who can’t manage their ego either quit or become self destructive.

The longer you train, the better you become at not letting your ego become involved. At least, it works that way with most people. For an unfortunate few, the longer they train the more significant every perceived loss becomes. Being swept by a lower belt becomes a big deal. This self directed frustration then manifests itself in ugly ways.

Scissors throw

Not this kind of scissors throw

How ugly can it get? Very ugly. I once witnessed a black belt instructor being submitted by a smaller blue belt twice via the same submission. After class the blue belt was acting up and the instructor told him to stop. The blue belt didn’t so the instructor picked up a pair of scissors and again told him to stop or else he’d throw the scissors at his head. Laughing with the ludicrousness of the situation, the blue belt continued so the black belt stepped forward, wound up and hurled the scissors at the blue belt’s head. Fortunately the rotation of the scissors caused the handle to strike first so there was no significant injury other than a mark by the eye.

While this is obviously an extreme example, being controlled by your ego makes for bad BJJ. Frustration causes you to lose the sense of fun and excitement that is the main reason we train.

How do you know if you have ego problems? If you find yourself thinking these kinds of thoughts. “I should be able to pass this guard, he’s only a white belt”. “He beat me with strength, not good jiu-jitsu”. “I don’t want to roll with that opponent, he might submit me”.

Part of my job as a coach is to make sure ego problems don’t occur and to fix them quickly if they arise. These are the things I do.

  1. Deal with any ego problems in myself. Members of a club always follow the lead of the head instructor. I conduct myself the same way I want everyone else to behave. I tap if I get caught. I roll with everyone. I don’t make excuses.
  2. Everyone trains with everyone. This is the most important part of ego control. When you train with someone and know their name, you become friends. Rivalry is friendly rather than hostile. It is much harder to feel superior, which is a common precursor to ego problems.
  3. No cliques. Cliques encourage an “us vs them” elitist attitude which is poisonous within a club.
  4. No favouritism. It’s extremely tempting for a coach who sees a promising student to want to give them more attention. This is wrong for two reasons. Firstly it causes jealousy and alienation amongst the other students. Secondly, most of a student’s learning comes from their training partners, not their coach. It is an arrogant coach who thinks that a little extra instruction makes much of a difference in the long term.
  5. Watch for people who look frustrated after rolling. Frustration indicates the person feels they should have done better. This student needs immediate assistance to help quell their rising ego.

You may think you don’t have any ego problems because you don’t feel superior to anyone. Ego isn’t just about feeling superior, it’s about any sort of false expectations you have regarding yourself. Stop, breathe and remember why it is you train BJJ. BJJ is about having fun and the way you feel after training.

3D Treening

Ron, an instructor from 3D Treening Estonia, was the first to show me the importance of having a good training partner.

You can’t learn BJJ by yourself, you need training partners. The better your training partners, the faster you will improve. The fastest way to improve is to have a club full of good training partners. So, how do you become a good training partner?

If you look at any BJJ instructional (or most BJJ classes) you will find that all the instruction is for the student learning the move. No guidance is given for their training partner who, in absence of instruction, usually becomes 100% compliant. This type of training teaches a student how to perform a move on a compliant opponent. But during a roll their opponent is fully resisting, not compliant. A student will have obvious difficulty performing the move when rolling as there is no bridge between compliance and full resistance.

SBGi’s I-method focuses on bridging the gap between full compliance and full resistance. The rest of this post assumes you are using isolation training.

Everyone agrees that good training partners are important. But what is a good training partner? Most of the writing I could find is obvious and trite e.g. “A good training partner is trustworthy and won’t hurt you”. Saulo Ribeiro uses the cliché “challenging but not difficult” in his book, which is a better description. Cane Prevost gives a big hint when he says “one student is drilling the move, the other is coach”.

A good training partner has the goal of helping his partner to get better at what he is drilling. Helping his partner improve is the only goal. He is not thinking up counters for the move or planning how he would deal with the move in a roll. If he has his own agenda then he is a bad training partner.

Enough generalities, let’s look at the specifics of how to train your partner. Your partner has a rough idea of the move or position he is working. Your job is to ensure he does it correctly. You do this with your movement, not with words. This is important. Keep your mouth shut.

Exaggerate the mistake. This is your main training tool. Your partner will be making mistakes with his pressure and positioning. You need to draw his attention to these mistakes so he will self correct them. If he leaves too much space, you move away to increase the space. If he doesn’t apply enough pressure to hold you down, you sit up. You draw attention to his mistake by exaggerating it, then allow your partner to correct it himself.

Re-order the sequence. Most moves or positions have a sequence of objectives that must be achieved in order for the overall move to be successful. You want to train your partner to follow this order. You do this by undoing previous objectives or yielding future ones. You mess up the order. The only way for your partner to be successful is to follow the correct sequence.

Consider training your partner to have a good top side control. Your partner is at the objective of killing your inside arm. To undo a previous objective you might move your hips away to insert a knee. Your partner will need to deal with this previous objective (block the hip) or lose position. Or you could yield a future objective (attacking the far arm) before he has completely killed the inside arm. If he attacks the far arm before killing the inside arm, he is unlikely to be successful.

Create mistakes. Here you create the types of mistakes that were made while you were exaggerating the mistake. You move yourself or push your opponent to create space and relieve pressure. If your opponent doesn’t react, you then further exaggerate the mistake until he notices and corrects it.

Increase intensity. Your overall goal is for your partner to be successful with the drill at 100% intensity. As your partner has success you increase your intensity to challenge him. Aim for a level of intensity where your opponent is having success, but has to work for it. Too much intensity causes your partner to fail, which only causes frustration and stops him learning. Too little intensity and it becomes too easy and your partner stops thinking and learning. You need to pay close attention to your partner to deliver the correct intensity level.

Ryan Hall ADCC 2009: closed guard

Ryan Hall is well known for his aggressive guard.

Closed guard is a powerful position for the guard player as it restricts the top person’s movement by immobilising their hips. A person skilled at closed guard will be seeking to off balance his opponent by breaking posture and cutting angles to threaten sweeps and submissions. A person unskilled at closed guard will be doing nothing but keeping his ankles tightly locked together.

Here is an unfortunately familiar series of events. A beginner starts BJJ. He gets submitted many times when rolling. He eventually gets closed guard and holds it as hard as he can. He doesn’t get passed and submitted. From then on, he pulls closed guard as much as possible. He doesn’t get passed so he thinks he is improving. Time passes. He gets passed when he attempts armbars or triangles, so he only attempts submissions that don’t require him to uncross his ankles. He eventually experiments with other types of guards and quickly gets passed so he returns to the safety of closed guard. The longer this continues, the further behind his guard skills will be. It will be much more (emotionally) difficult for him to develop the rest of his guard game when the time comes.

It is very easy for a beginner to fall into this trap. I was in that trap myself for the first couple of years training BJJ and I’ve seen several of my training partners fall into it as well.

I no longer teach closed guard to beginners. I consider closed guard a more advanced guard that requires good hip movement skills before it can be effective. This has had some interesting outcomes. The students that I delayed showing closed guard to are much more active with their BJJ. They fight harder to achieve the top position, and their submission attempts from guard are more aggressive.

Martin Aedma published a very good post about guard attitude a few months ago. It’s worth reading.

BJJ is a combat sport and injuries happen. One of my friends injured her knee in the 2009 Pan Pacific BJJ comp. It took a long time to heal and she had just started training again when she re-injured it during wrestling class. This got me thinking about all the injuries I’ve witnessed during my years of training. The most common injuries are knee injuries and they almost always occur when training takedowns.

When a student is unskilled, a common takedown attempt is to grab their opponent’s upper body and try to trip her with their legs. Injuries can occur if the opponent’s foot sticks to the mat while her body is twisted. This twisting pressure can injure the tendons around the knee.

To stay safe, the wrestler must keep a lower stance which will help keep the feet mobile. Of course merely telling the wrestler this doesn’t help. They must practise in a way that develops a need to do so. With this in mind I changed the way that takedowns are trained. Since I’ve made this change, everyone’s standup grappling skills have improved, they are more confident on their feet and no injuries have occurred.

For two weeks, no takedowns were allowed. Students formed small groups with two students wrestling and the other few watching. The goal of the two wrestlers was to simply pick their opponent up so both feet are off the mat. The winner stays in and the next student comes in, round robin style.

The student is forced to have a good stance to be successful at this drill. Their hips must be low and away from their opponent while they fight for an advantageous grip. Once they’ve established a good grip, they must bring their hips under them to have the power for the lift. They are also learning how to sprawl with heavy hips to prevent being picked up themselves.

The natural progression of this drill is for the students to have their head too low and hips too far back, to prevent themselves from being lifted. When this happens, snapdowns are introduced. The rules are changed so that if a wrestler’s hand touches the mat he instantly loses. This rule change corrects the stance.

As there are no takedowns, there is no fear of being injured or slammed. Students stop being timid and more aggressively work their shots. When everyone is looking confident, the rules are changed so that merely picking the opponent up isn’t enough to win. They must also put (not slam) the opponent down onto the mat. This part of the drill is physically difficult as it requires lots of energy.

Next single leg takedowns are allowed. Then double leg takedowns, and finally any takedowns. We are now back to practising full takedowns, but everyone has much better stances. Their sprawls are better and also their pummelling has improved.

I really like the way that this sequence of drills worked to improve everyone’s standup grappling. It works well because the students teach themselves. Instead of saying “Bend your knees, hips back, head up”, I just say “Try to lift me up off the mat but don’t let me lift you up”. The drill does the rest.

Small details can make all the difference in BJJ. For example, grabbing at the hand instead of the wrist can be the key detail that allows a successful armbar. Because of the huge effect of seemingly small details we can become obsessed, beginning a quest in search of perpetual refinement. The problem with this is that there are two categories of details, details that are universal and those that are specific to the individual.

An example of a universal detail — rear naked choke: aligning the crook of your elbow with your opponent’s chin is a more effective choke because pressing is applied to both of the carotid arteries. Universal details are performed by everyone in the same way.

A more individual detail, and one that is commonly sought by beginners, is as to the exact place to focus your weight when in side control top position. Everyone you ask will give a different answer depending on their body type, their opponent’s body type and their position the opponent is in.

Universal details can be precisely described by your coach. Individual details must be confirmed through rolling or isolation training.

As coaches, it is our responsibility to clearly distinguish between these categories of details. An approach I take is to identify universal details to the class as the “ideal”. Individual details are identified as “options that may or may not work for you”. I only go into more depth with individual specific details when I am working with individuals or pairs.

Very early in my BJJ career, I attended a seminar where the black belt detailed the correct posture to have when kneeling in an opponent’s closed guard. He emphasised the detail that your butt should never touch your heels, but should hover over them by about an inch. The black belt never explained why we should hover this way. Whenever I tried this my thigh muscles fatigued quickly, and so I abandoned that detail.

But it’s always stuck in my mind. I’ve watched many high level competition matches and have never seen anyone else performing this detail. So why was this detail emphasised? Why is it important? My best guess was that having the thighs under tension allows your legs to react faster than when relaxed. The mystery was finally solved when I read Cane Prevost’s closed guard top posture post.

Cane details “Hips rotate in and up. You should feel your pelvis lift slightly off the floor”. Aha! This position puts the glutes under tension, but without much fatigue. The tension allows the legs to react fast to regain balance if needed. I believe that the original hover detail was individual specific, while Cane’s detail is a universal way of achieving the same result.

This example really emphasises for me the confusion that a student feels when there is no distinction between universal and individually specific details. As good coaches, we should strive to make this distinction to our students.